
It’s two years exactly to the day when we first took on our plot nestled along the railway tracks edging to Hampstead Heath. The end of end-of-May Bank Holiday 2018. We’ve come a long way since then.
Here’s a story by the big guy, laying out the design process of our growing shed. Enjoy!

We started with a jungle of brambles & tall grass, May 2018
The Building of a Building: Shed How-To’s

Everything was built around the location of our chairs! The lattice panels were found in the garbage & rescued.
The first decision that was undertaken was where a shed could be placed on the plot and if so, how would it be orientated to maximise storage and yet minimise the impact on otherwise good growing areas.

The start of the second set of stairs in the heavy sloping clay.
The biggest challenge was how to erect a shed on such uneven and frankly destabilised land. The gradient at the rear of the plot steeps up quite sharply in the last 6 feet of space and excavating the land to level it was not a great idea due to the upper private property’s lawn and garden at the rear sloping downward somewhat precariously, with their retaining wall showing evidence of repairs and shoring-up at some time in the distant past, as do many of the upper plots along the strip of railway easement that make up the site.
We also had to consider height restrictions due to guidelines and not to have to remove any larger limbs or branches of the trees at our rear as they provide both shade and privacy.
At the end of deliberations we settled on a construction that would be 6 feet deep by 5 feet wide and offering an internal stand height suitable for anyone under 6′ 5” tall. Entrance was to be from the centre of the upper terrace of the plot. So we drew up the plans roughly and submitted it to the allotment committee for approval.

Rough plan of our plot, with shed dimensions, submitted early 2019.

Side panels up & stairs are complete.
The first task was to remove the years of heavy undergrowth, and somewhat archaeologically removing debris and waste material like metal bars, broken pottery and even an old tire!
The second task was to create a second set of stairs on the left side of the upper terrace so as to be able to work safely and to get up to the rear of the plot with materials without slipping dangerously.
Once that was done the ideas had begun to flow on how to make a shed on uneven ground that cannot be excavated.
We settled on a somewhat ingenious technique which is to say, we would build a shanty-type structure on a raised platform that could “cope with the slope” so to speak.
Using recovered scaffold poles as pilings, we drove the tubes down to a depth of about 3 feet and then, once levelled reasonably well for height, used scaffold flanges as fixing points, which could also be used to fine-tune the levelling by raising or lowering any one flange within its 1.5 inch range of pipe surround. This method can also be used in the future should the shed settle unevenly on the ground.

Preparing the platform for the shed base.
We used an 18″ x 1/2″ drill bit in a rechargeable drill to make inroads into the hard clay below the surface. The drilled holes would allow the displaced material a place to go once the driving of the pilings began.
Once the pilings were sledge-hammered in and levelled using straight scaffold lengths, strings and a long spirit level, we filled the poles with sharp building sand which we reckoned would help firm them in the ground and provide internal friction to stop any subsidence of the shed once weighted on its supports.
We also elected to have a sloped roof to catch rainfall and steer it into a water butt via guttering and a downpipe.


The platform was probably the most expensive part of the unit, requiring two sheets of marine-quality plywood which was coated with green fence preserver a number of times to ensure longevity. That ran about £75 for the sheets and £10 for the pail of green-coat. The framing was normal lumber from Homebase, what we refer to as “two by fours” at about £2.65 per piece, selected carefully for straightness and absence of knots.

Base installed & level, spring 2019; daffodils coming into bloom in pots at the top of the stairs.
The walls were to be of cladding, bought at 50% off, in packages of ten 8-foot long pieces per pack for something like £7.50 each, requiring 8 packs. They were meant to be used indoors specifically, but we figured if they were pre-coated with preserver and then done over again seasonally, they should do the job nicely to create attractive walls and should hold up to the elements with a little care and maintenance.
We see other sheds on the plots which have not fared so well to the burn of sun and lashing of rain, but they probably would have survived if they had been offered a little preventative TLC over time. Some are looking like they should be redone completely and actually, some have been torn down by newcomers since we arrived two years ago… We didn’t want to end up going down that route, so pre-emptive efforts were made as we carried on construction.

Shed floored & framed. Painted green on St Patrick’s Day, 2019.
Now, here’s the tough part. There is no electricity on site. So, this shed was built using nothing more than a level, a tenon saw, some clamps, vise-grips, a silicone-seal gun, and a cordless drill and drillbit kit… the latter two items from Argos. (The green Guild branded tools are actually really decent quality and excellent value!)
The cladding was quite fragile, so every mounting screw had to have a pilot hole drilled first to avoid it splitting the piece.
The rear of the shed, which would be well hidden from view, was cased in using 3/4″ plywood recovered from various locations and this added much needed rigidity to the build, as the framing itself was not as sturdy as one would have hoped, but still good enough for us, no “up-to-code” requirements on this project!
The design of the shed itself was intended to have two functions: to store items neatly, but also to serve as a potting shed and a greenhouse, not as a glasshouse per se, but as a sun-trap and a warm container for seeding and keeping more delicate plants like our beloved lemon tree over the winter.

Side elevations get covered, leaving spaces for side and back windows
And so, we installed a large (and expensive) sheet of found-in-the-rubbish Perspex clear acrylic plastic ‘window’ facing south into the sun, and also created two skylights in the roof much like the sunroof of a car, which would allow maximum light to filter through.
The skylights were purchased acrylic sheet that was pre-drilled, screwed and siliconed into place. The final roof covering was of a heavy-duty clear tarpaulin to allow light to pass while giving a good waterproof membrane up top, stapled under the eaves with heavy gauge staples.
Two doors were fitted, one normal width, one half width, the half-door not to be used often but could be opened up if needed for access.
Inside the shed, we chose mirrored glass for the large shelf and clear glass shelves mounted on shelf brackets covered with cut bicycle innertubes to provide anti-slip grip. Most of these materials were retrieved from the garbage!

All done – roof complete, doors on.
The clear shelves allow light to pass down onto plants and seedlings below and the mirrored shelf bounces the light back up.
We also hung old mirrors on the walls to maximise incoming light by bouncing it back onto any foliage happily growing inside our shed.

Pea box installed on front-facing side. Navajo totem arrows above.
The new front-facing growing box was to be for growing peas, functional and also a nice camouflage for the shed to blend into its surroundings, which it has done nicely since it has settled into the space.


Successfully completed garden shed & growing space. (Summer 2019)
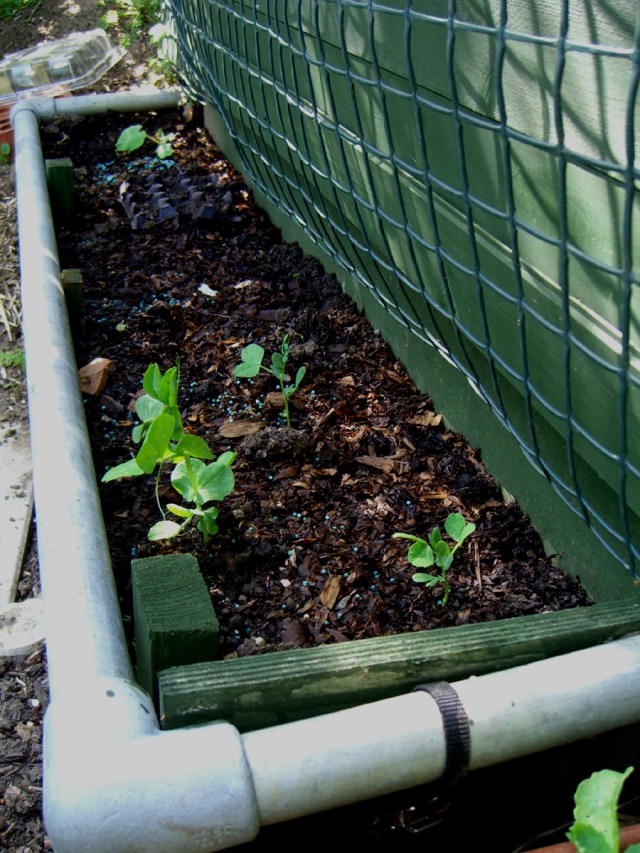
Pea bed in front of shed, with pea seedlings. (22 May 2020)
